Garden Zip Wire Kit Installation Tips for Beginners
Introduction: Start Your Backyard Adventure the Right Way
Installing a garden zip wire kit might sound intimidating, but with the right tips and a bit of patience, anyone can do it. Whether you’re a DIY newbie or just want to make sure everything goes smoothly, this guide offers practical, beginner-friendly advice to help you set up your garden zip wire kit safely and correctly.
Step 1: Choose the Right Spot
The first and most important decision is location. For your garden zip wire kit, you’ll need two solid anchor points—typically trees or wooden posts. Measure the distance between them. Most kits support lengths between 20 to 50 meters, but always check your product’s specifications.
- Tip: Pick a spot with a slight downward slope for a smooth ride.
- Tip: Avoid areas near walls, fences, or obstacles.
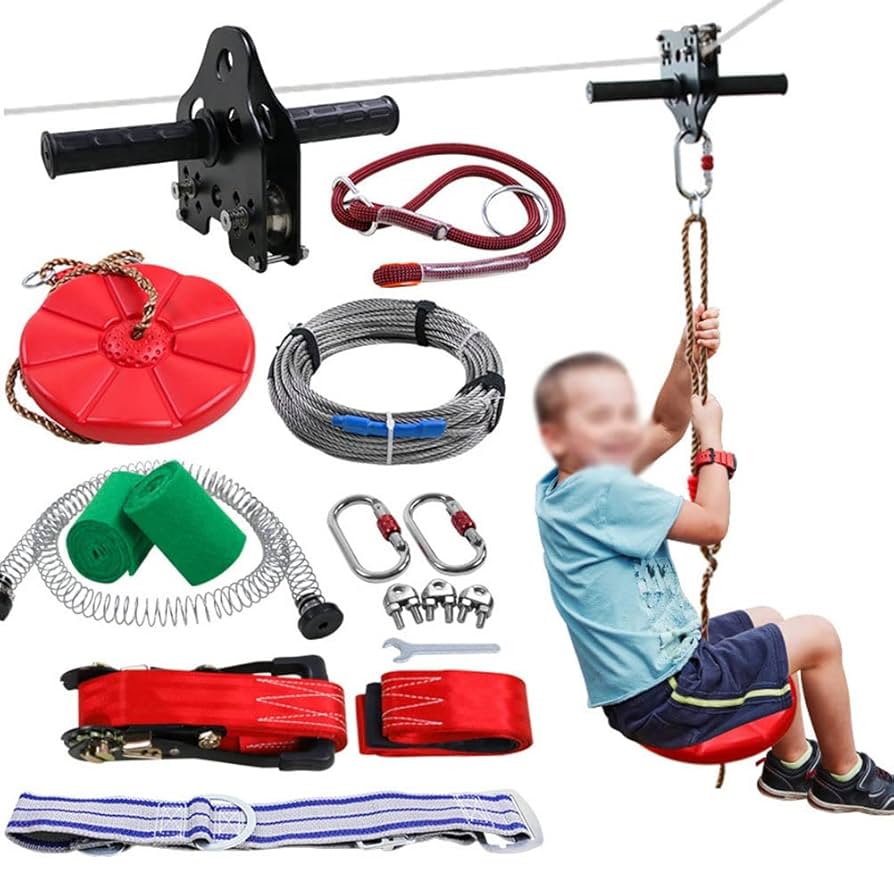
Step 2: Understand the Components
A garden zip wire kit usually includes:
- Steel cable
- Trolley (the moving part you ride)
- Cable tensioner
- Mounting clamps and bolts
- Optional seat or harness
Take time to lay out and identify each part before starting. Familiarity will help make the installation easier.
Step 3: Prepare the Anchor Points
Strong trees with thick trunks are best. If using posts, ensure they are buried deep in the ground with concrete to keep them stable under tension.
- Tip: Use tree protectors to avoid damaging your trees when wrapping the cable.
Step 4: Install the Cable
Wrap one end of the cable around your starting anchor and secure it with the included clamps. Thread the cable through the trolley before attaching it to the second anchor point.
- Tip: Make sure the cable is tight. A loose cable means a bumpy, unsafe ride.
- Tip: Use the turnbuckle or tensioner to fine-tune the tightness.
Step 5: Attach the Trolley and Seat (if included)
Once the cable is in place and secure, slide the trolley onto the line. Some garden zip wire kit models include a seat or harness—attach it securely to the trolley using the provided hardware.
- Tip: Ensure the trolley moves freely and doesn’t stick or rattle.
Step 6: Safety Checks Before Use
Your garden zip wire kit must pass several checks before the first ride:
- Is the cable tight and stable?
- Are the clamps and bolts fully secured?
- Does the trolley run smoothly from start to end?
- Are the stopping blocks (if included) installed at the end of the line?
- Is there enough ground clearance at the lowest point?
Step 7: First Ride and Adjustments
Test the garden zip wire kit with a lightweight object first—like a sandbag or water jug—before letting anyone ride. Make sure the line holds, the trolley rolls smoothly, and the braking or stopping mechanism works.
- Tip: Always supervise children during use and insist on safety gear like helmets and gloves.
Maintenance Tips After Installation
To keep your garden zip wire kit in top condition:
- Check the cable tension every few weeks.
- Look for signs of wear or rust on metal components.
- Tighten any loose bolts or clamps.
- Store removable parts indoors during extreme weather.
Common Beginner Mistakes to Avoid
- Using unhealthy or narrow trees as anchor points
- Skipping the tensioning step
- Ignoring the slope of the cable
- Forgetting to test the setup before first use
Avoid these, and your garden zip wire kit will deliver safe, long-lasting fun.
Conclusion: Confidence in Every Ride
Installing a garden zip wire kit is totally doable—even if you’ve never tackled a DIY project before. With solid planning, the right tools, and a little patience, you’ll have a thrilling ride set up in no time. Follow these beginner tips, and your garden zip wire kit will bring adventure and excitement to your backyard for years to come.
Leave a Comment